Know How to Convert Shared Mailbox to User Mailbox & Vice Versa in Office 365


“Hello Everyone! One of our employees is leaving our organization and now I have to convert user mailbox to shared mailbox. By doing this, we will be able to free up a mailbox license and can access his old data. So, can anyone please guide me how to perform the task? Any help will be appreciated!”
Many Office 365 users have such kind of queries and looking for a reliable solution to do the same. So, for this, you must migrate regular mailbox to shared mailbox which will retain all the emails and calendar items. The latter mailbox can be accessed by multiple team members and if required then you can convert shared mailbox to user mailbox with ease.
Important Points
- The user mailbox which you are going to convert to Office 365 shared mailbox should have Office 365 license assigned to it. Else, you will not be able to perform migration. In case, you have removed the license, then first you must allocate the license to user mailbox. You can remove the license once you are done with the conversion.
- Do not delete the user’s account as it will be used for anchoring shared mailbox. But if you have already deleted that user then you first have to restore the removed user. Office 365 offers 30 days of time to restore user mailbox.
- You have to make sure that the mailbox size is less than 50 GB to convert user mailbox to Office 365 shared mailbox without assigning the license. For that, you can delete large sized emails with attachments to reduce the mailbox size less than 50 GB.
How to Convert User Mailbox to Shared Mailbox
- Login to your Microsoft Office 365 admin account and go to Admin Center.
- Here, click go Admin Centers >> Exchange.
- Click on recipients and then press mailboxes.
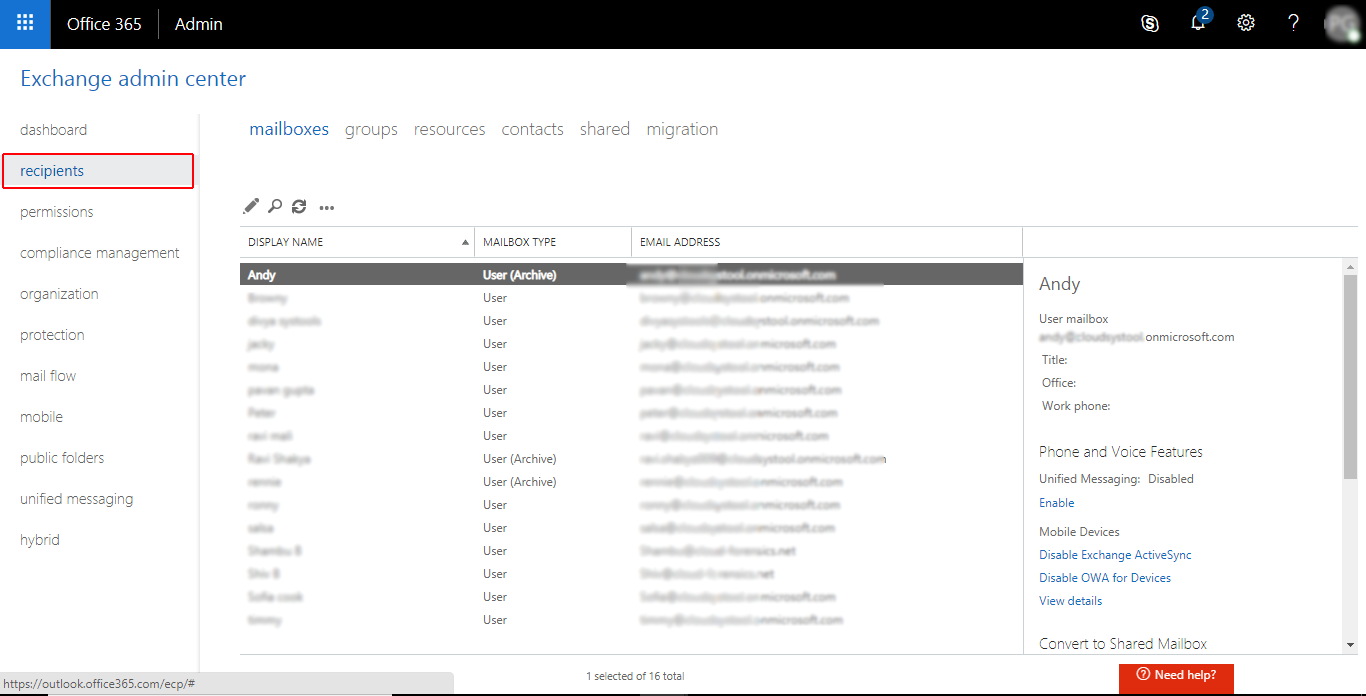
- Select the user mailbox and then go to Convert to Shared Mailbox & hit Convert button.
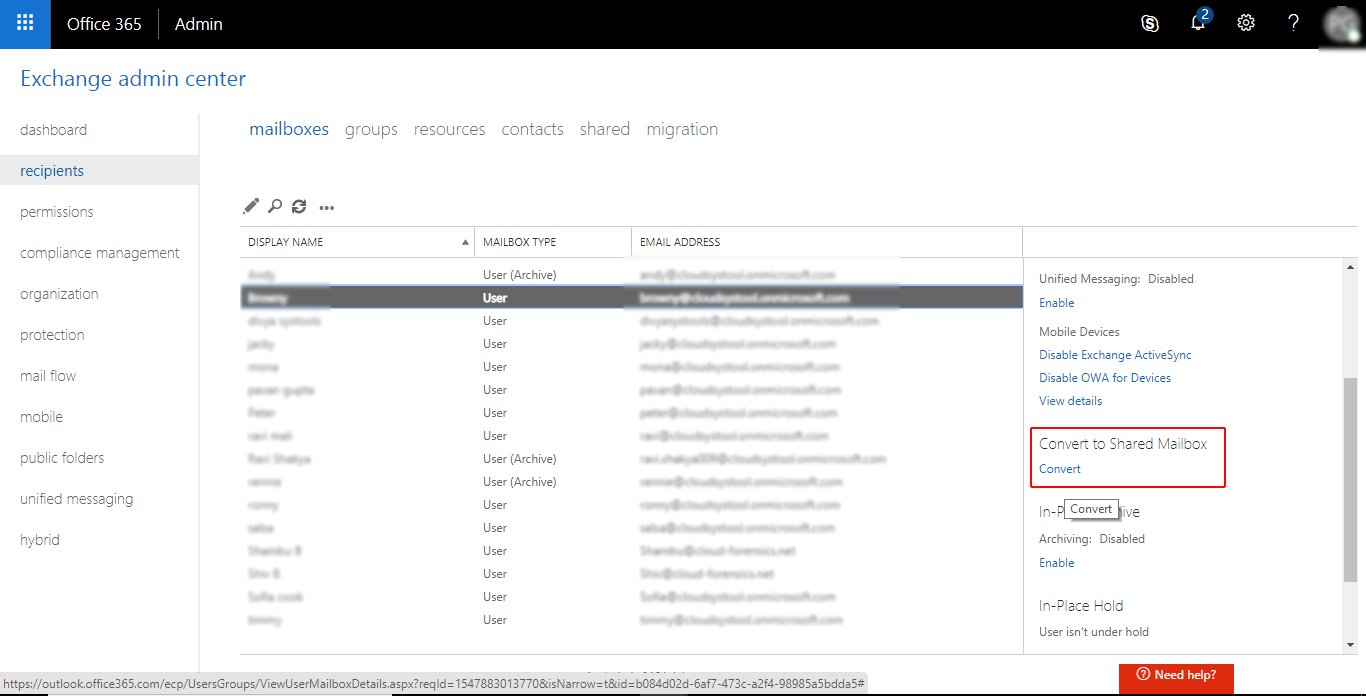
- If the user’s mailbox size is less than 50 GB, then you can deallocate the license to save subscription charge.
Important Note: Make sure you only remove license and not the user mailbox because that account will be required for anchoring.
- If you are global admin, then you can also use PowerShell command to migrate regular mailbox to shared mailbox on-premises. You can use “set mailbox – type shared” command to perform the action.
In the above section, we have discussed the manual steps to convert user mailbox to Office 365 shared mailbox. If a user wants to do vice-versa, then you can go through the following section.
How to Convert Shared Mailbox to User Mailbox – Detailed Steps
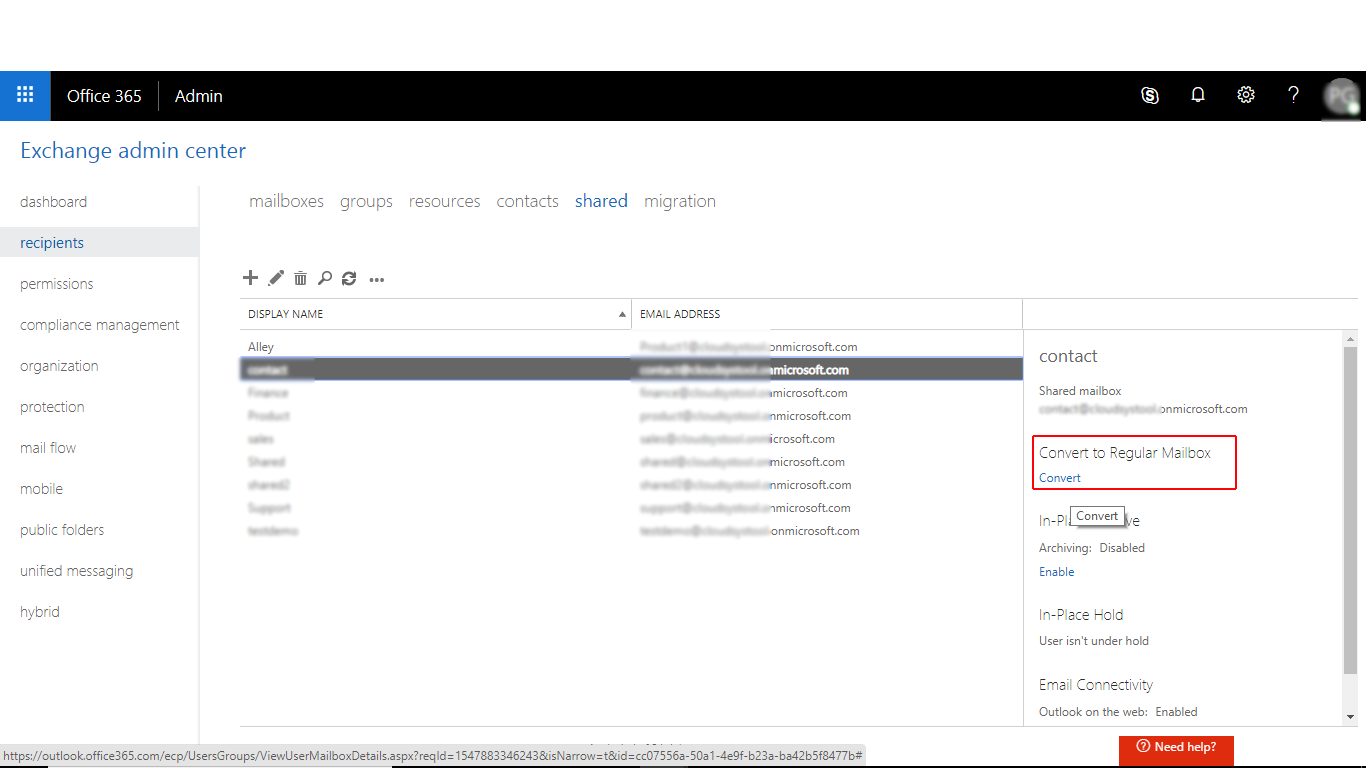
- Navigate to Admin Center and then click on admin centers >> Exchange.
- Click on recipients tab and then go to shared tab.
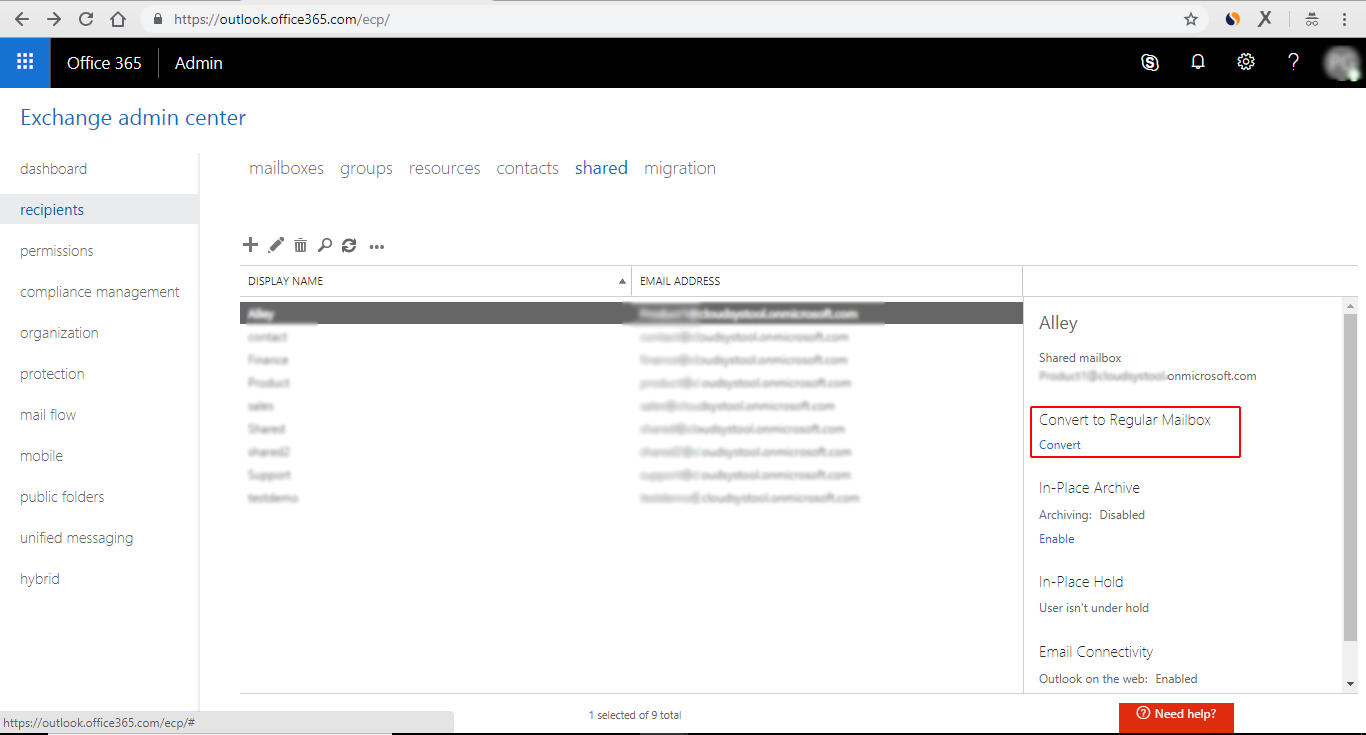
- Select the shared mailbox that you want to migrate and then go to Convert to Regular Mailbox and click Convert.
- Now, go back to the admin center and select the user account which is associated with shared mailbox. Then, allocate license to the account and reset password.
This entire setup process might take some time to get completely functional as a regular mailbox. After signing in successfully, the user can access emails and calendar of the shared mailbox.
Read More: Microsoft PST Collection Tool & its Alternatives
Final Words
One of the most asked user queries i.e. how to convert user mailbox to shared mailbox and migrate shared mailbox to regular mailbox is answered in this article. This feature comes handy for organizations when their employees leave but they cannot delete their account due to crucial data stored in them. Additionally, mailboxes with size smaller than 50 GB do not require any license to be functional which is also considered while going for conversion.