How to Bulk Import MSG to Office 365? Updated 2026 Guide


Looking for a safe way to bulk import MSG to Office 365? Then you are at the right place. Here in this article we will guide you how to move MSG files to Office 365 using both manual and professional methods. As MSG files cannot be directly imported into Microsoft 365, a lot of users face challenges and get into traps with multiple unreal manual ways. Read the article to understand methods completely with proper steps, pros and cons.
Pre-Migration Steps
It is essential to follow these steps to have a complete preparation and ensure a smooth migration.
- Store all the MSG files at once so that you can upload them easily without finding each folder at a time.
- Check internet connectivity. As an interruption can lead to a slow or incomplete process.
- Verity that your Office 365 account has enough space to store MSG files.
- Confirm that you can sign in to your Office 365 account and the mailbox is actively accessible.
- If using a work account then ensure you have enabled the required permissions.
Now, in the upcoming section you will explore a humanly possible practical method to migrate MSG files to Office 365.
Manual Method to Import MSG to Office 365
It is one of the common and simplest manual ways to perform MSG to Office 365 migration without using any third-party software. However, this method requires the Microsoft Outlook email client. So, follow the instructions carefully to avoid errors or data loss issues.
- Open Outlook.
- Go to File > Info > New Account.
- Enter your Office 365 email address and details it is asking for.
- Once Outlook successfully syncs your Office 365 mailbox.
- Simply right-click > select New Folder > enter a name. This will create a folder where you can import MSG files.
- Now, go to the location of your MSG files.
- Select and drag & drop them into the desired folder.
This is how you can transfer MSG to Office 365 via manual approach. This may look like a simple method but it has some limitations which are necessary to know before proceeding with it. For you, we have mentioned some in the upcoming section.
Challenges Faced with Manual Way
- Importing thousands of files at once can lead to slow performance or lag Outlook working.
- Does not provide any option to selectively transfer emails as per their date or subject.
- This method requires Outlook and configuration setup.
- Non-technical users can feel confused as this method has complex configuration steps.
- During this approach, the original folder hierarchy may not be maintained.
To avoid the technical limitations, using a dedicated software is a smart choice. We have mentioned a pro tool below to help you save your time in finding the best software from the heap of other softwares. So, keep reading with us.
Pro Tip: Use Automated Solution to Migrate MSG to Office 365 Safely
The Office 365 Import Tool is an easy-to-operate tool that helps users to directly import MSG to Office 365 in a few clicks. The tool is perfect for all types of users including professional and home users who want a simple process with no technical complexities.
In addition, the software supports bulk importing MSG files to Office 365 accounts while preserving all the email properties and attachments in the original form regardless of their file size. Users can test its free demo version by simply clicking on the download button attached below.
How to Import MSG to Office 365 Directly with Ease?
- Download and launch the above MSG to Office 365 migration tool.
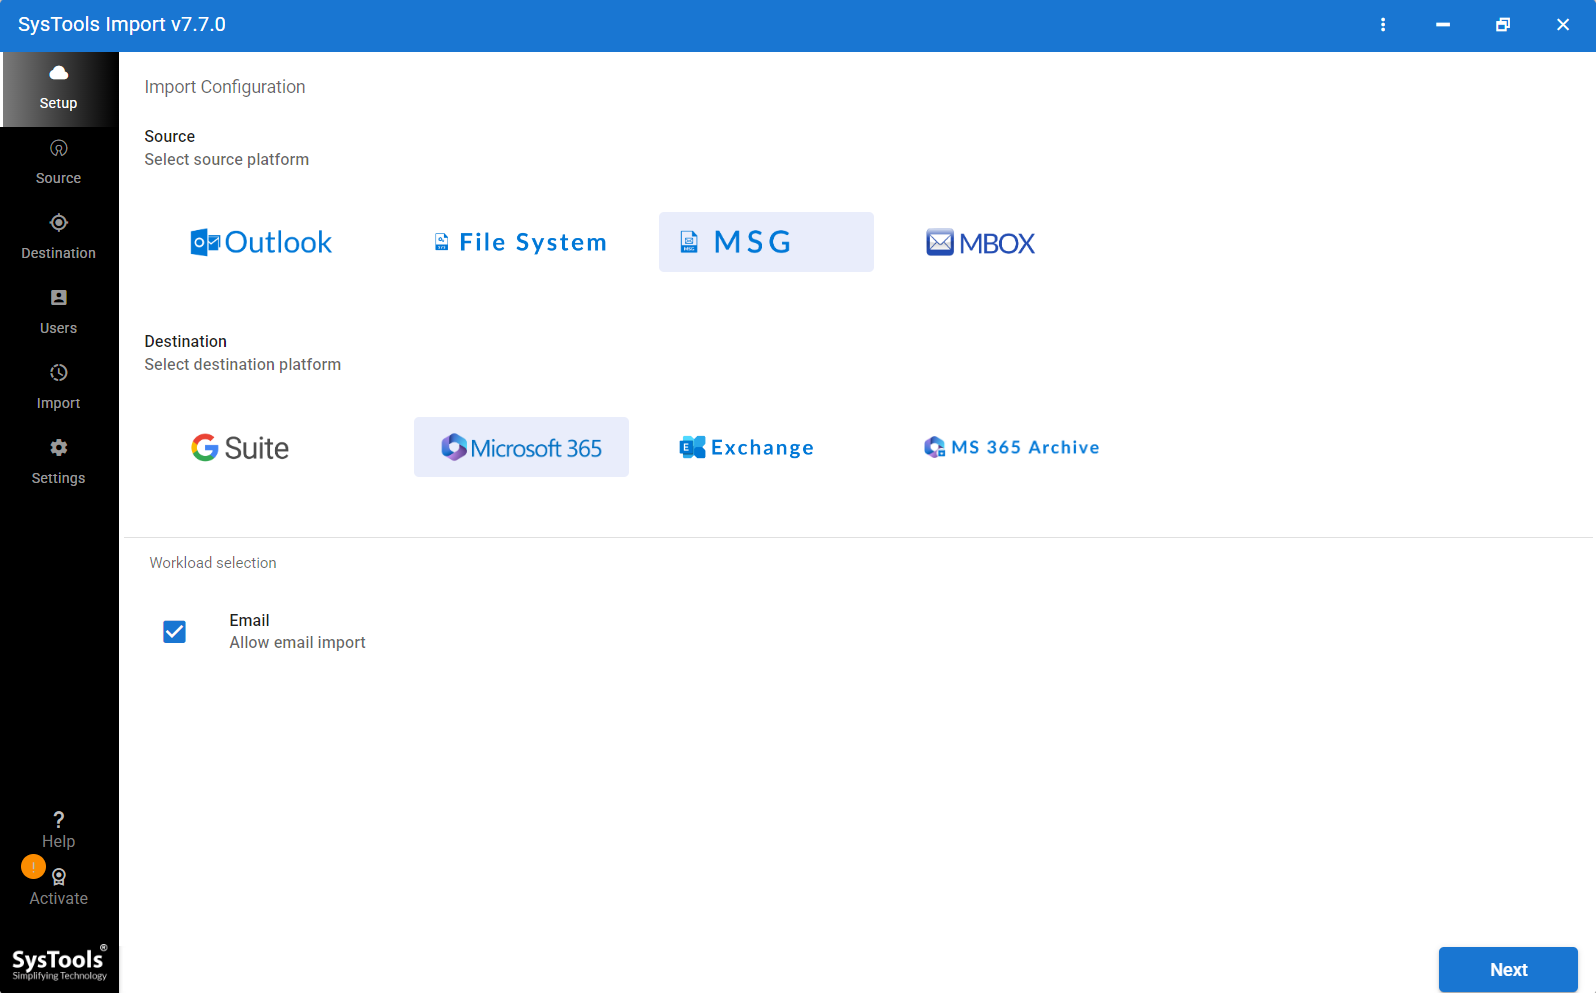
- Select source as MSG and Microsoft 365 from the Destination options.
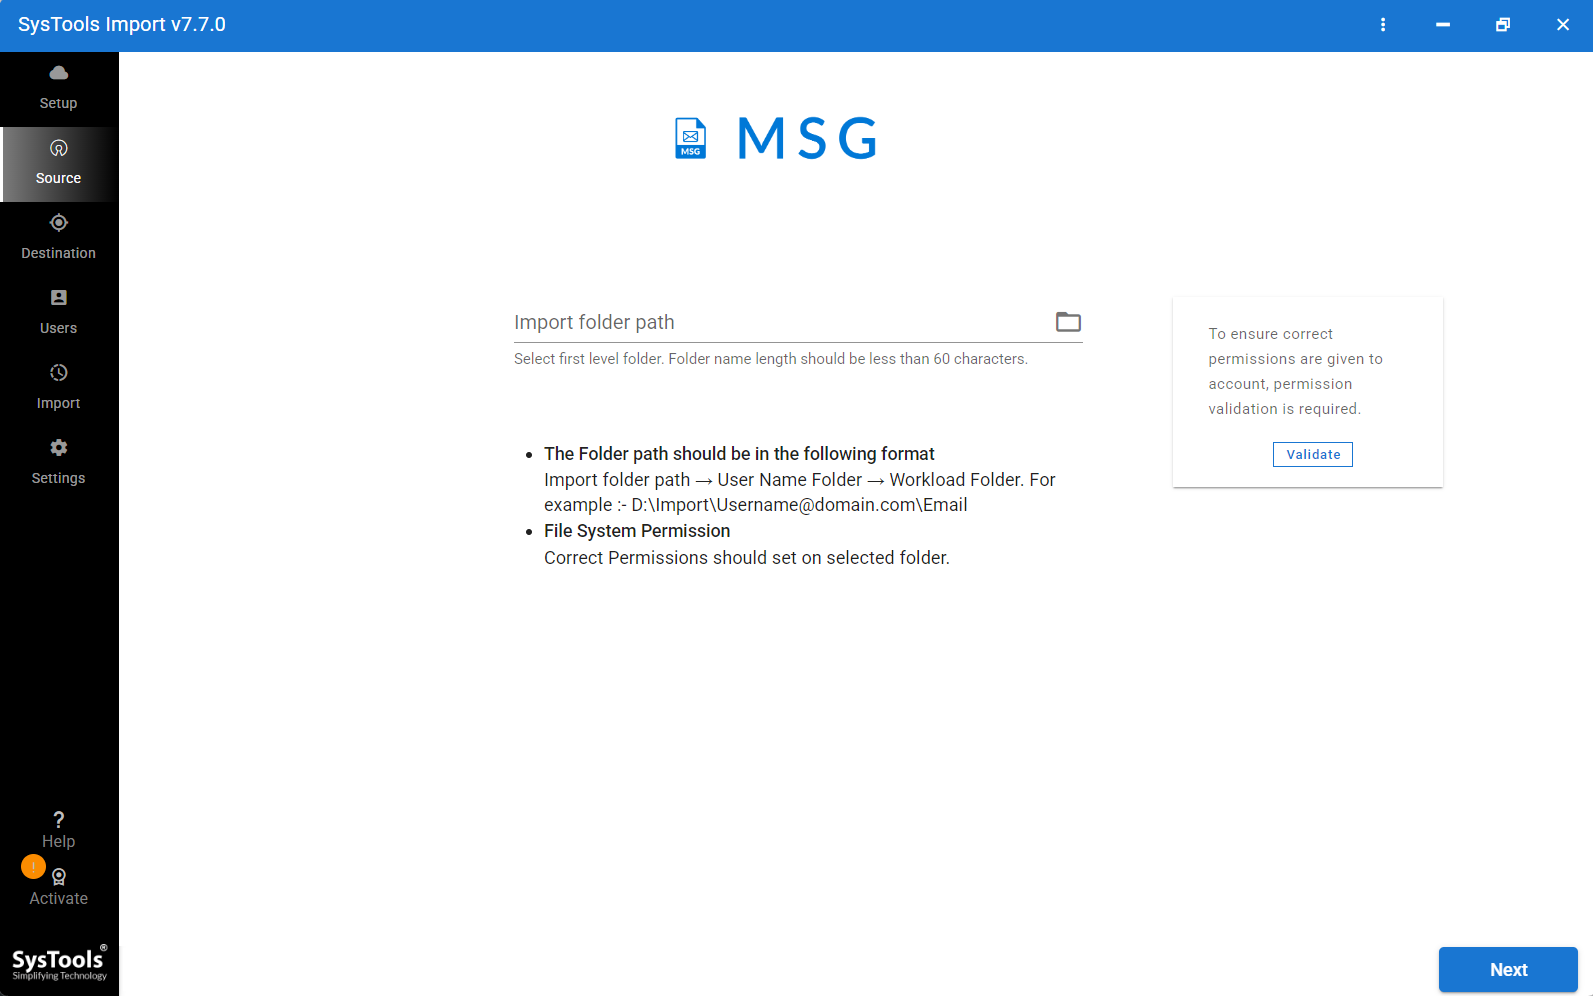
- Hit the folder icon and select MSG files stored on your local drive.
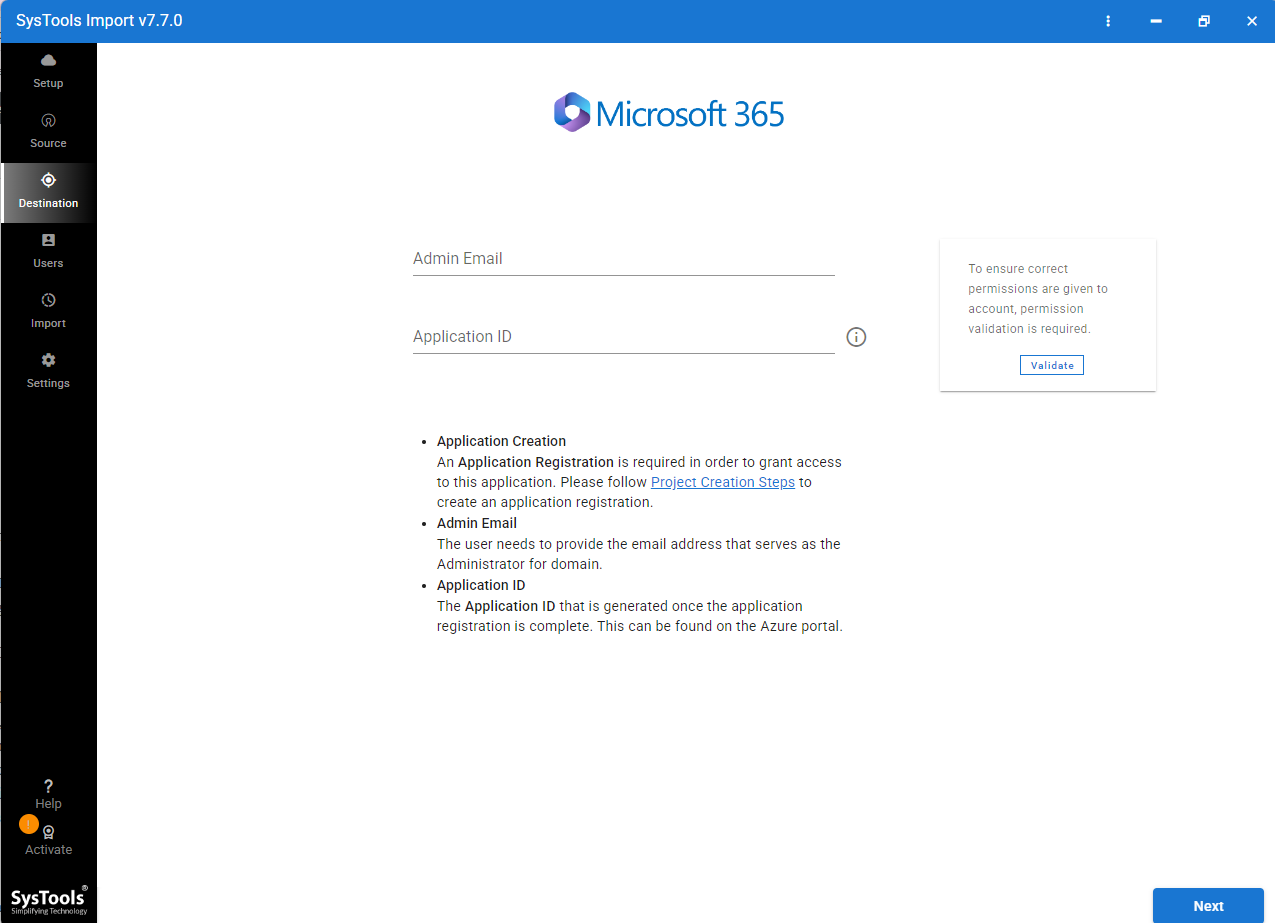
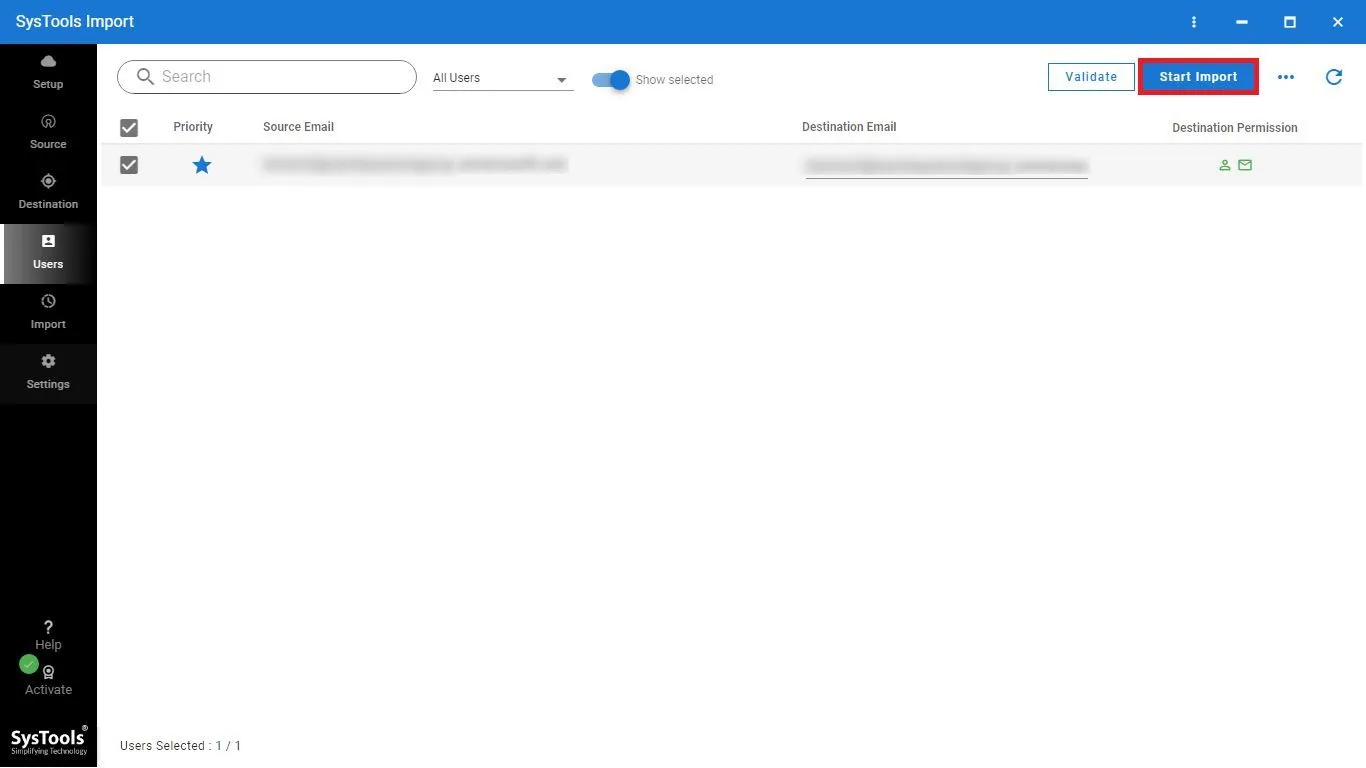
- Enter Office 365 email address and application ID. Next, click on Validate.
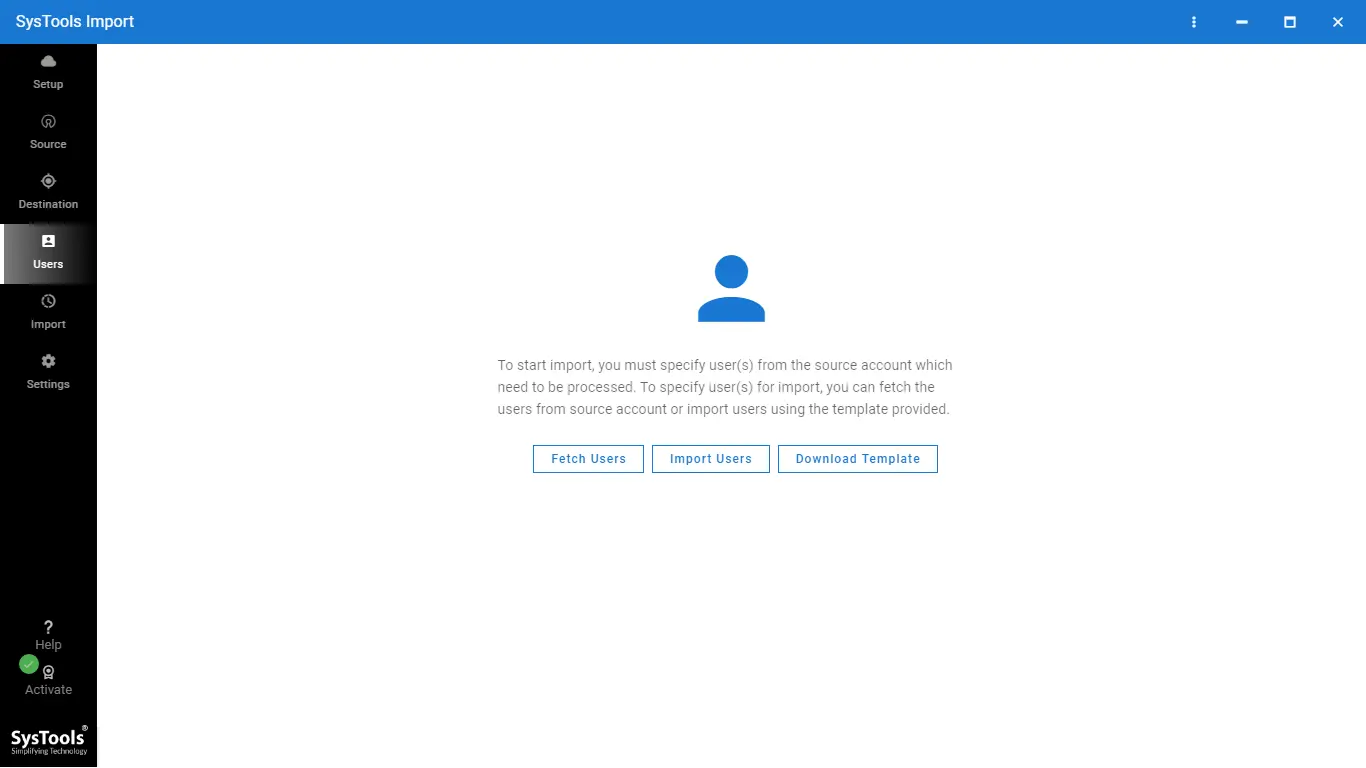
- After that, press the Fetch users option to select the user targeted mailbox.
- Now, go to the Settings icon and set the concurrent user scale.
- Finally, re-visit the Users section and click on Start Import.
Benefits of Using the MSG to Office 365 Converter
- The tool is 100% safe and clean.
- Has the ability to import MSG to Microsoft 365 user accounts.
- The software offers users a date range filter to select a start and end date for selective migration.
- It preserves all email attributes, folder structure and mailbox properties intact during the import process.
- Using this utility, users can transfer large MSG files to Office 365 without facing any file size limitations.
- Moreover, allow users to re-run the failed migration without restarting the complete process.
- After completion, the tool generates a CSV report that includes every detail about the process and helps users to track migration.
- Compatible with all versions of Windows OS whether a user is working in an old or latest edition.
- Last but not the least, the software supports an option to set concurrent users scale up to 10 which enable users to import data as per their system configuration capabilities.
Post-Migration Checklist
Once the MSG to Office 365 migration is completed, it is important to verify that the imported data is transferred correctly. So, follow these steps.
- Login to your Office 365 account and check that the MSG files are successfully imported or not.
- Compare the number of MSG files at starting to the ones appearing in the Office 365 account. This helps to ensure that no data is lost.
- If needed, save the tool’s generated report for future purposes.
- Open random MSG files and verify whether they include attachments and every detail or not.
Final Words
We hope till the end of this guide you have discovered the best method to import MSG to Office 365 that best suits your needs. A manual method is also there and works 100% but it also has risks and complications. On the other hand, professional software is a more reliable option for users who handle a large volume of data and want a hassle-free migration process. It reduces the manual effort and chances of having errors. At last, the choice is yours, we can only recommend you the best & safe method.